Showing posts with label Gift Bags. Show all posts

Sunday, 1 December 2019

TOMIC December Challenge - A Christmas Gift Box


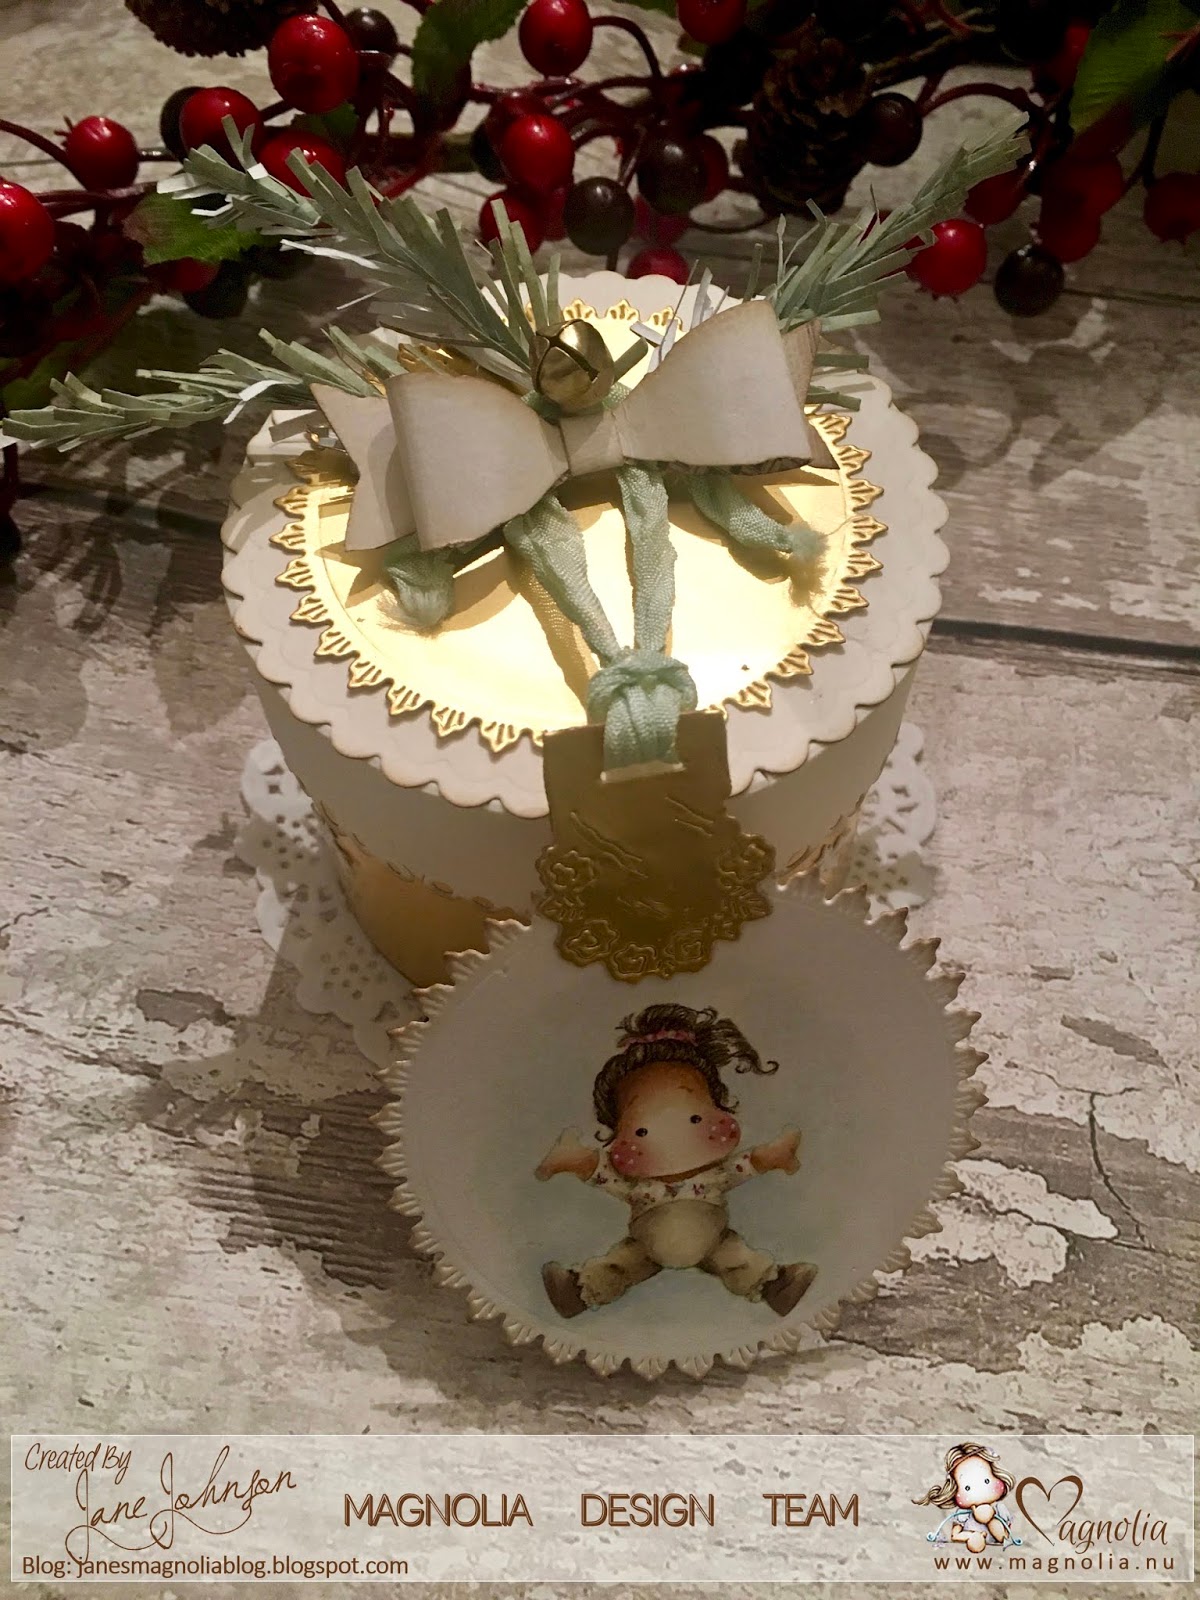
Good morning!  I hope you've had fun opening your Advent calendars this morning!  If you managed to get your hands on the Magnolia Advent calendar you might recognise the little cuties on my gift box today for our new TOMIC challenge.  I have created a round gift box with gold and cream cardstock for a sophisticated Christmas look.


For the tag I have used a Doohickey from Volume 23 and the mini wrapping tag and Tilda from the Advent calendar's early bird envelope.  It is difficult to see in the photo but I have added some Wink of Stella to Tilda's trousers to make them a shiny gold.


This little wrap tag will come in handy for all sorts of tags and bags!


I used the same circle as the tag on the lid of my box and topped it with a paper bow and pine fronds created with the incredible Doohickey die from Volume 1, and topped them with a jingle bell.


I added tiny snowflakes cut with the Doohickey dies from Volume 23 and the edge of the lid was cut with a lace edge Doohickey from the same volume.


I hope you like it and I've inspired you to join us this month at TOMIC.  Pop over to the blog to see the rest of the team's stunning gift boxes!

Wednesday, 20 February 2019

A Gift Bag

Good afternoon!  I have made a gift bag this week for my Craft Heaven post using two gorgeous new Tilda's from the latest stamp kit.  I have used a mixture of Maja Design papers and papers from my stash.


I don't know the name of these images yet but this Tilda isn't holding the present, she comes with her outstretched hand which you could place all sorts of the small accessory stamps on, which is great!  I've used the small gift stamp that came with the set.  I have painted with Distress Inks and used a white gel pen for the dots on her eyes and cheeks.


The bag was cut with the heart frame from Vintage Box 5 and the balloons are also Doohickey dies.


 The sentiment is from the Raising the Ceiling collection and I have added lace and flowers from Craft Heaven.


I also added a rose gold glitter star that I recycled from a bought card.


I used the cut off strips from two different Maja Design papers to make the handle.  I love that Maja Design papers have these strips, they're so useful!


On the back of the gift bag I have used another new Tilda, also painted with Distress Inks.  I have used To and From stamps from a Magnolia kit and cut them out with a tag Doohickey from Volume 3.

I hope you like it and I've inspired you to join us at Craft Heaven.  Thanks for looking! x


Wednesday, 31 October 2018

Magnolia Blog Hop!

Hello Magnolia Lovers! A very warm welcome to our latest Magnolia Design Team Blog Hop.
The Design Team is proud to present you the beautiful collection of new stamps from the latest two collections which are: Bugs Kisses & Halloween Wishes and Le Cirque Collection.
This blog hop is sponsored by Magnolia Rubber Stamps Sweden and of course you have the chance to win one gorgeous prize from Magnolia Rubber Stamps on every single blog you visit and leave a comment!!! So please be sure to hop on every blog and leave some love!
The blog hop runs until the 3rd of November!! The DT will announce the winners on the 5th of November in the evening on their personal blogs.
And now let’s start the fun blog hop!!! If you came from Paulina's blog you’re on the right track! If you just happened to visit my blog, please CLICK HERE to start from the beginning.
Here is my project for the Blog Hop!!!!!!

I created a circus tent card and co-ordinating gift bag from a recycled bag that I just love the colours of.


For the card I painted Circus Rain Tilda with Distress Inks using the no lines technique and added Stardust Stickles to her umbrella.


I used the gorgeous Sakura Lanterns Doohickey die to decorate the circus tent and the Lovely Lace Doohickey along the top of the opening.


I used the pennant from the Flag and Cloud Doohickey set to complete the circus tent.


I added some pink twine and 10mm roses from my stash to the top of the tent.


I used the Lovely Lace Doohickey again to create the circus ring at the bottom of the card.


On the recycled gift bag I used my favourite stamp from the Le Cirque Collection, Clown Tilda Dress, again painted with Distress Inks, and added Stardust Stickles to her skirt, ribbons and the heart she's holding.


I hope you have enjoyed visiting me today.


Good luck!

Here is the whole blog hop list:

Now it’s time to hop over to my very inspiring DT friend Sabrina. Don’t forget that the Blog Hop runs until the 3rd of November!
And remember you only have the chance of winning a lovely prize from Magnolia Rubber Stamps, if you leave a comment on all of the blogs!
Thank you so much for stopping by, we hope to have inspired you with our creations. Love to you all and, as always, Good Luck!

Friday, 30 March 2018

Doohickey Kit Volume 18 - Flower Bag Tutorial

 Good morning!  If you were lucky enough to get your hands on Doohickey Kit Volume 18 then you will have seen my first ever creation as a Magnolia DT member in print!  I'm so excited to have a double page spread in the magazine!  I thought I would share with you a tutorial showing how to make the flower bag.

You will need:

Two 12"x12" sheets of designer paper
Two 12"x12" sheet of cardstock
40cm length of ribbon
Flower stamens
Peony Doohickey Die
Butterfly Doohickey Die
Go Kreate Flower Frames Die
Walnut Stain Distress Ink
Inking tool


Step 1.

 Cut out two flower shapes from your chosen designer paper using the smallest Flower Frame die from Go Kreate, and thirty flowers using the three petalled Peony Doohickey die.

Step 2.

 Ink the edges of all of the flowers using Walnut Stain Distress Ink.

Step 3.


 Separate all of the Peony flowers into individual petals as shown.  I did this by simply tearing them.  Curl all of the petals with your fingers to create definition.

Step 4.


 Arrange three petals inside each petal of the frame die cut as shown and glue at just the base of each petal.

Step 5.


 Continue adding petals in concentric circles, overlapping them so that each petal covers the join above, until you reach the centre.  Glue stamens into the middle.

Step 6.


 Cut a piece of cardstock 25cm x 9cm.  Score each long edge 1cm away from the edges then cut notches to create tabs as shown above.  Cut a piece of your chosen designer paper 25cm x 7cm and ink the edges with Walnut Stain Distress Ink.  Glue the paper panel in the centre of the cardboard strip, between the tabbed edges.

Step 7.


 Cut out two flowers using the same Go Kreate flower frame die as in step 1 from cardstock.  Glue the tabs of the panel onto one of the cardstock flowers as shown, then attach the other one in the same way.

Step 8. 


Your bag should now look like this.  Glue the petalled paper flowers onto the cardstock sides.

Step 9.

Punch holes in each side of the bag and, using a 40cm length of ribbon, thread it through the holes and knot on the inside of the bag.

Step 10.

Add a butterfly cut with the Butterfly Doohickey die as shown.


 Your bag is now ready to use for a gift to someone special.

♥ 

Wednesday, 7 March 2018

Bath Bomb Bag

 Good morning!  Over on the Craft Heaven blog I'm sharing my Bath Bomb Bag I made for my son to give his girlfriend for Valentine's Day.  The papers are a mixture of Pion Design and Maja Design's Celebration collection.
I have used lots of love themed Doohickey dies - this love tag was from kit 3, Oh La La.
 The gorgeous Eiffel Tower die was from the same kit.  I have added some ruched tulle ribbon around the gift bag and added some flowers.
The main flower was made with the Peony Doohickey die from ecru Foamiran.
I used the Heart Tag die for the tag, tied onto the ribbon closure.
 The love birds tag is also from the Oh La La kit and I have added feathers cut with a Doohickey die too.
The top of the bag and the band around the middle were edged with the Tilda 
Lace Doohickey die.
 I hope you like it and thanks for looking! x