Friday 30 March 2018

Doohickey Kit Volume 18 - Flower Bag Tutorial

 Good morning!  If you were lucky enough to get your hands on Doohickey Kit Volume 18 then you will have seen my first ever creation as a Magnolia DT member in print!  I'm so excited to have a double page spread in the magazine!  I thought I would share with you a tutorial showing how to make the flower bag.

You will need:

Two 12"x12" sheets of designer paper
Two 12"x12" sheet of cardstock
40cm length of ribbon
Flower stamens
Peony Doohickey Die
Butterfly Doohickey Die
Go Kreate Flower Frames Die
Walnut Stain Distress Ink
Inking tool


Step 1.

 Cut out two flower shapes from your chosen designer paper using the smallest Flower Frame die from Go Kreate, and thirty flowers using the three petalled Peony Doohickey die.

Step 2.

 Ink the edges of all of the flowers using Walnut Stain Distress Ink.

Step 3.


 Separate all of the Peony flowers into individual petals as shown.  I did this by simply tearing them.  Curl all of the petals with your fingers to create definition.

Step 4.


 Arrange three petals inside each petal of the frame die cut as shown and glue at just the base of each petal.

Step 5.


 Continue adding petals in concentric circles, overlapping them so that each petal covers the join above, until you reach the centre.  Glue stamens into the middle.

Step 6.


 Cut a piece of cardstock 25cm x 9cm.  Score each long edge 1cm away from the edges then cut notches to create tabs as shown above.  Cut a piece of your chosen designer paper 25cm x 7cm and ink the edges with Walnut Stain Distress Ink.  Glue the paper panel in the centre of the cardboard strip, between the tabbed edges.

Step 7.


 Cut out two flowers using the same Go Kreate flower frame die as in step 1 from cardstock.  Glue the tabs of the panel onto one of the cardstock flowers as shown, then attach the other one in the same way.

Step 8. 


Your bag should now look like this.  Glue the petalled paper flowers onto the cardstock sides.

Step 9.

Punch holes in each side of the bag and, using a 40cm length of ribbon, thread it through the holes and knot on the inside of the bag.

Step 10.

Add a butterfly cut with the Butterfly Doohickey die as shown.


 Your bag is now ready to use for a gift to someone special.

♥ 

Wednesday 28 March 2018

Folding Box Theatre Card

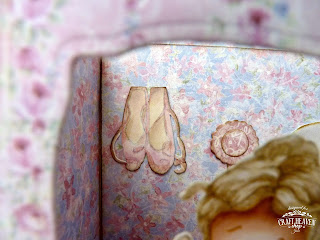
  Good morning!  I have another special card to share with you today for Craft Heaven.  This is another birthday card I made for my daughter who is studying ballet.  I was so inspired by Jiwon's incredible Edwin Castle card that I asked her permission to make a similar card.  Watch the video below to find out how the card works!


If you are a fan of pictures here's my usual posting below:
The papers are all by Maja Design and I have used stamps from the Spellbound Kit along with the piano which is a very old Magnolia stamp.  The background stamp is also from many years ago.  The stunning ornament on the top of the theatre is from Craft Heaven of course.


The bows are from the Spellbound Kit too.
I have used Doohickey dies to create the hearts on the sides.
Another older Magnolia stamp and a die from last year's Advent Calendar. 
I have used Prima Ballerina Tilda and Tilda's Dressing Table on the back of the card too.
 I've used the Heart Keyhole on the front of the theatre doors.  I hope you like it and thanks for looking! x


Tuesday 27 March 2018

The Greatest Showman Birthday Card


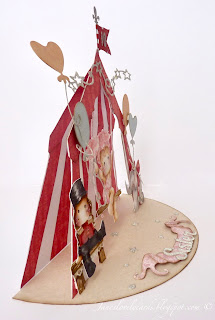
Good morning!  Today I have a very special card to show you that I made for my daughter's 10th birthday.  She is obsessed with The Greatest Showman at the moment so I had the idea to create a card on that theme!  I designed the tent shaped card freehand and used a Doohickey die to cut the fancy shape at the top of the curtains.
 I thought Elephant Show Tilda from the Little Moscow collection was perfect to represent Anne Wheeler and painted her with pink hair to suit!  All of the images have been painted with Distress Inks using the no lines technique.  I have also painted her hair and costume with a Wink of Stella pen for that essential sparkle.  The swing is also a Magnolia stamp, from the Magnolia and Lilacs collection. 
 Little Trumpety with Bow was also perfect for this card.  He's so cute!
 Tilda from the Christmas Party Collection is my representation of P T Barnum lol.  A pity there isn't an Edwin in this outfit!  I have popped her on the Christmas Lace Bench from the Aspen Holiday collection.
 I have used the balloon Doohickey dies for the balloons at both sides of the tent.
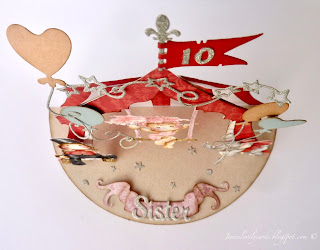
 The amazing star garland is from a previous Doohickey kit and I have also used the Flags Doohickey die on the top of the tent.  The number 10 was cut with a Tim Holtz die.
 I used the banner from a previous Doohickey kit and the off stars from the star garland on the base of the card. 
 Here is the card from the side...

...and from the top!
 I hope you like it and thanks for looking!
I have prepared a little video to show how the card opens out.  Check it out below!


♥

Wednesday 21 March 2018

You are Invited!

 
Good morning!  For today's Craft Heaven post I have an afternoon tea invitation that I made for my Mum for Mother's Day.  I have used papers from Maja Design's Denim & Friends collection.

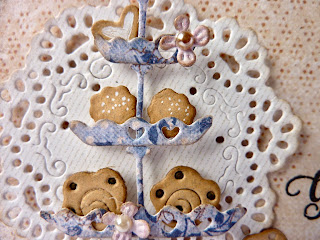
 I used the cake stand and doily Doohickey dies along with the cakes from the oven Doohickey die set.
I had fun making the tiny cakes and biscuits look more realistic with sprinkles and icing using a white gel pen and chocolate drops using a Walnut Stain Distress Ink Marker.
 The sentiment is from the You are Invited collection and the gorgeous heart lace is from Craft Heaven.
 I added a little tear in the paper with some cheesecloth and a pale blue rose.
 I hope you like it and thanks for looking! x


Monday 19 March 2018

Masquerade Tilda

 Good morning!  Today I have my card for the All About Magnolia Challenge to share with you.  We have a Bingo card to play around with for this month's challenge.  I have chosen the diagonal line, 'Flowers, Doohickey dies, Pearls', for my card.
 I painted Masquerade Tilda using the no lines technique as always.  If you would like to see how I painted her check out my YouTube Channel here.  The stars around Tilda are the offcuts from the star swirl die I've used below.
 I have added some tulips and hydrangeas from my stash, along with a flower cut with the Peony Doohickey die.
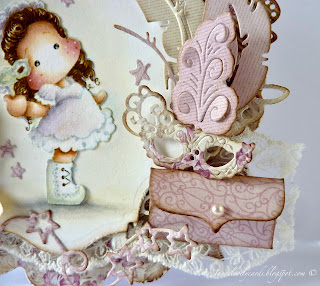
 I have used lots of Doohickeys on today's card.  The Masquerade mask is from the You Are Invited Collection and the little clutch bag is from a past Doohickey kit.
 I've also used a tag Doohickey and the Tilda's Ticket Doohickey.  The seam binding was white but I have dyed it wih Old Paper Distress Ink so that it matches the papers.
 The lace is from Craft Heaven and here you can see the star swirl underneath the image.
 The feathers are also cut with Doohickey dies.
I hope you like it and I've inspired you to join us at All About Magnolia Challenge!  Pop over to the blog to see the rest of the team's gorgeous creations.  Thanks for looking! x

Friday 16 March 2018

Sunbeam Collection Blog Hop


Hi everyone, and a big welcome to the 
Magnolia Blog Hop 
with the lovely Sunbeam Collection!

The Blog Hop is  
You will be able to win a lovely surprise 
in every blog you leave a comment in.

If you came here from Tanja you are on the right track. 
If you've just happened upon my blog, you can 
CLICK HERE to start from the beginning at 
Erika's blog. 

And if you want to hop a bit here and there,
here is the whole blog hop list:
  1. Erika
  2. Becky
  3. Diana
  4. Sabrina
  5. Claire
  6. Maria Irene
  7. Yulis
  8. Camilla H.
  9. Camilla S.
  10. Tina
  11. Yuri
  12. Mae
  13. Nancie
  14. Maki
  15. Debbie
  16. Tanja
  17. Jane


Here's my creation for the hop...


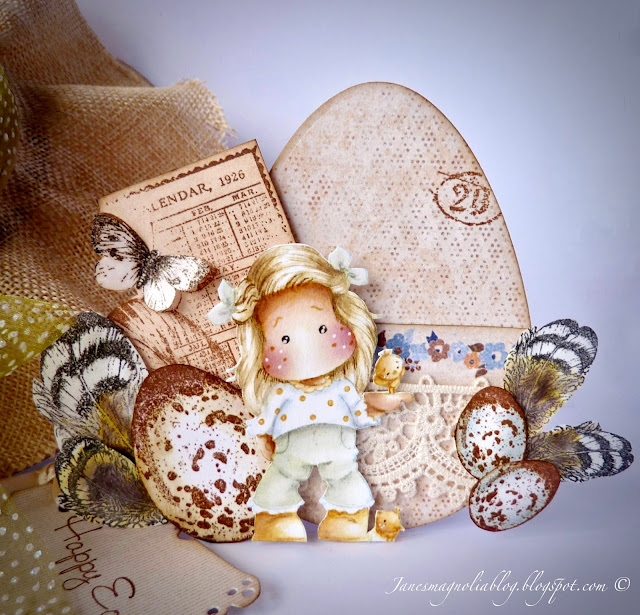
I have used Tilda with Little Chickens to make an Easter card and an Easter bonnet treat box.


I've painted Tilda with Distress Inks using the no lines technique.  I also used some stamps from Vintage Box 3, the eggs, feathers, calendar and '20' stamps.  


The papers are all by Maja Design from their Denim & Friends collection.  I stamped the butterfly section of the calendar onto coffee filter paper too.


I have painted the eggs and feathers with Distress Inks too.


To give the feathers a more realistic appearance I have stamped them onto coffee filter paper.


 Now for the Easter bonnet.  The top of the bonnet is a polystyrene hemisphere which I have covered with hessian.  A fresh coloured ribbon from my stash, a Doohickey tag and some daffodils I have made from Foamiran complete it.


Lift off the lid and inside there is an Easter treat!


Did you spot the super cute Hedgehogs from the Sunbeam collection too?


The Blog Hop will end this Sunday, March the 18th. 
And remember you will have a chance to 
win a secret prize from Magnolia
in all the blogs!!
So keep on hopping and leave some LOVE!
Thank you so much for stopping by
and good luck!


HOP NOW CLOSED

Hi everyone!
It is time to reveal the winners of the 
Magnolia DT Sun Beam
BOG HOP!!

Tam
*
ta
*
tam
*
tam
*
ta
*
tam

*
*
*
*
*
*
*
*
*
*


Take a look, 
maybe you are among the lucky winners!
If you find your name here, 
you must visit the blog you won in, 
and there the Designer will ask you to send her 
an e-mail with your full name and address.

Tina - Candy 

Congratulations to all the winners!!

And a huge thank you to all of you who participated in 
our Sun Beam Blog Hop!! 

A special congratulations to Ivy Ling, who won on my blog!
Will you please send me your full name and address 
to janeslovelycards@gmail.com

With love,
Jane