Friday, 13 December 2019

Let it Snow


Good morning!  I'm on a roll with the Christmas cards now!  This one features the gorgeous Tilda from the With Love From Paris Collection and Maja Design papers from their Christmas Season Collection.


I have painted Tilda with Distress Inks and once again added some Aleene's Glitter Snow around her feet and along the card edges.  I am loving this medium!


I have used the snowflake Doohickey dies from Volume 23 and added gems to their centres.  The card base was cut with the frame from Vintage Box 6.


I have used some gorgeous blue seam binding from Craft Heaven and a diamante snowflake charm.  The sentiment is an older one from Magnolia.


I hope you like it and thanks for looking!


Thursday, 12 December 2019

Dashing Through the Snow...


Good morning!  I have another Christmas card using the Magnolia Christmas Pop Up box, this time from the Dashing Through the Snow Collection. 


As always, I have painted Tilda with Distress Inks.  I have used some Aleene's Glitter Snow underneath her feet and to add the snowdrops around her.  It is difficult to see on the photo but it has a lovely soft shimmer to it.  I have used A New Year paper from Maja's Holiday in the Alps collection.


 I have used the Slender Firs Doohickey for the trees and three different Magnolia snowflake Doohickey dies for the snowflakes behind the image.


I used the Dashing Through the Snow sentiment from the set but cut each word out to stagger them on my card.


I hope you like it and thanks for looking!


Wednesday, 11 December 2019

Merry Little Santa


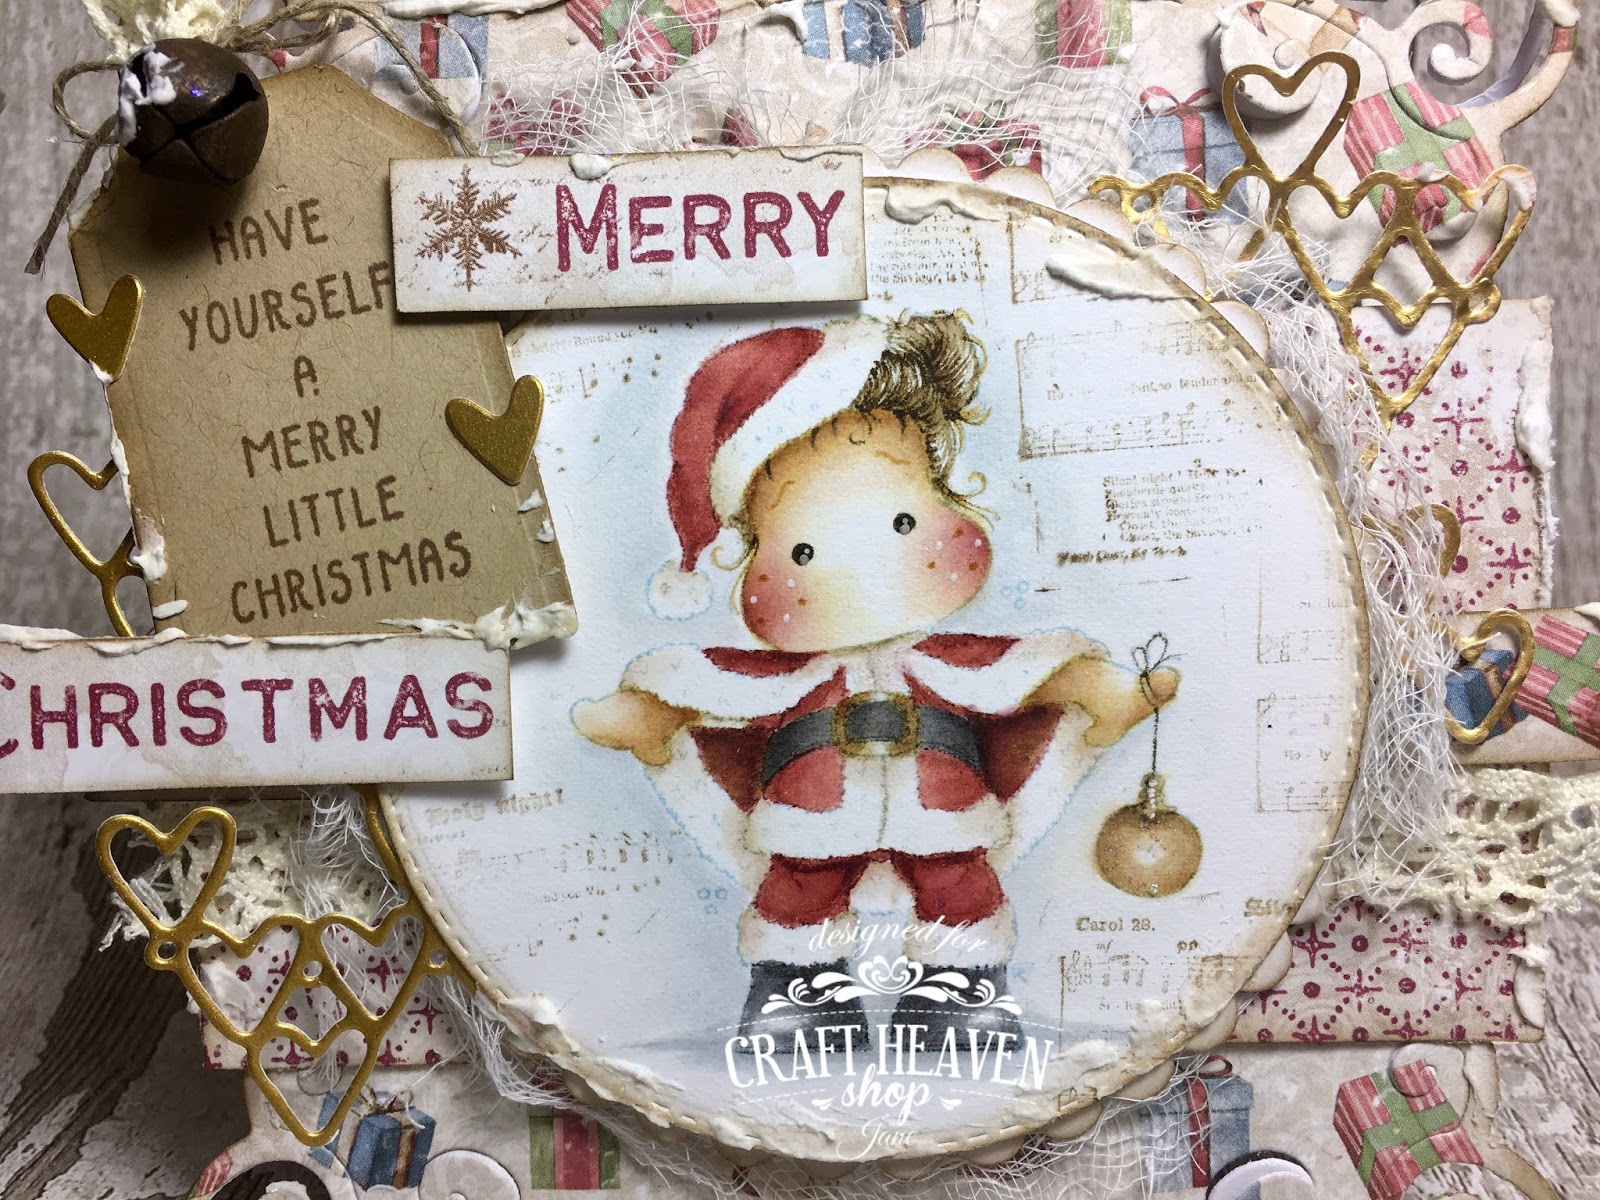
Good morning!  Today I'd like to share a Christmas card with you using the Merry Little Santa from the Magnolia Christmas pop up box and Maja Design papers.  I am so behind with my Christmas cards this year!  I will be blogging quite a few in the coming days!


I have painted Merry Little Santa with Distress Inks using the no lines technique and added white dots to her cheeks and eyes with a white gel pen.  I have also added Stardust Stickles to the bauble.  I have stamped around the edges of Tilda with the music score stamp that comes in the set.


I just love this new sentiment that came with them too!  The Merry Christmas was trimmed from the bottom of the Maja paper and I have used the Magnolia heart background Doohickey to create the gold hearts.


I hope you like it and thanks for looking!


Sunday, 1 December 2019

TOMIC December Challenge - A Christmas Gift Box


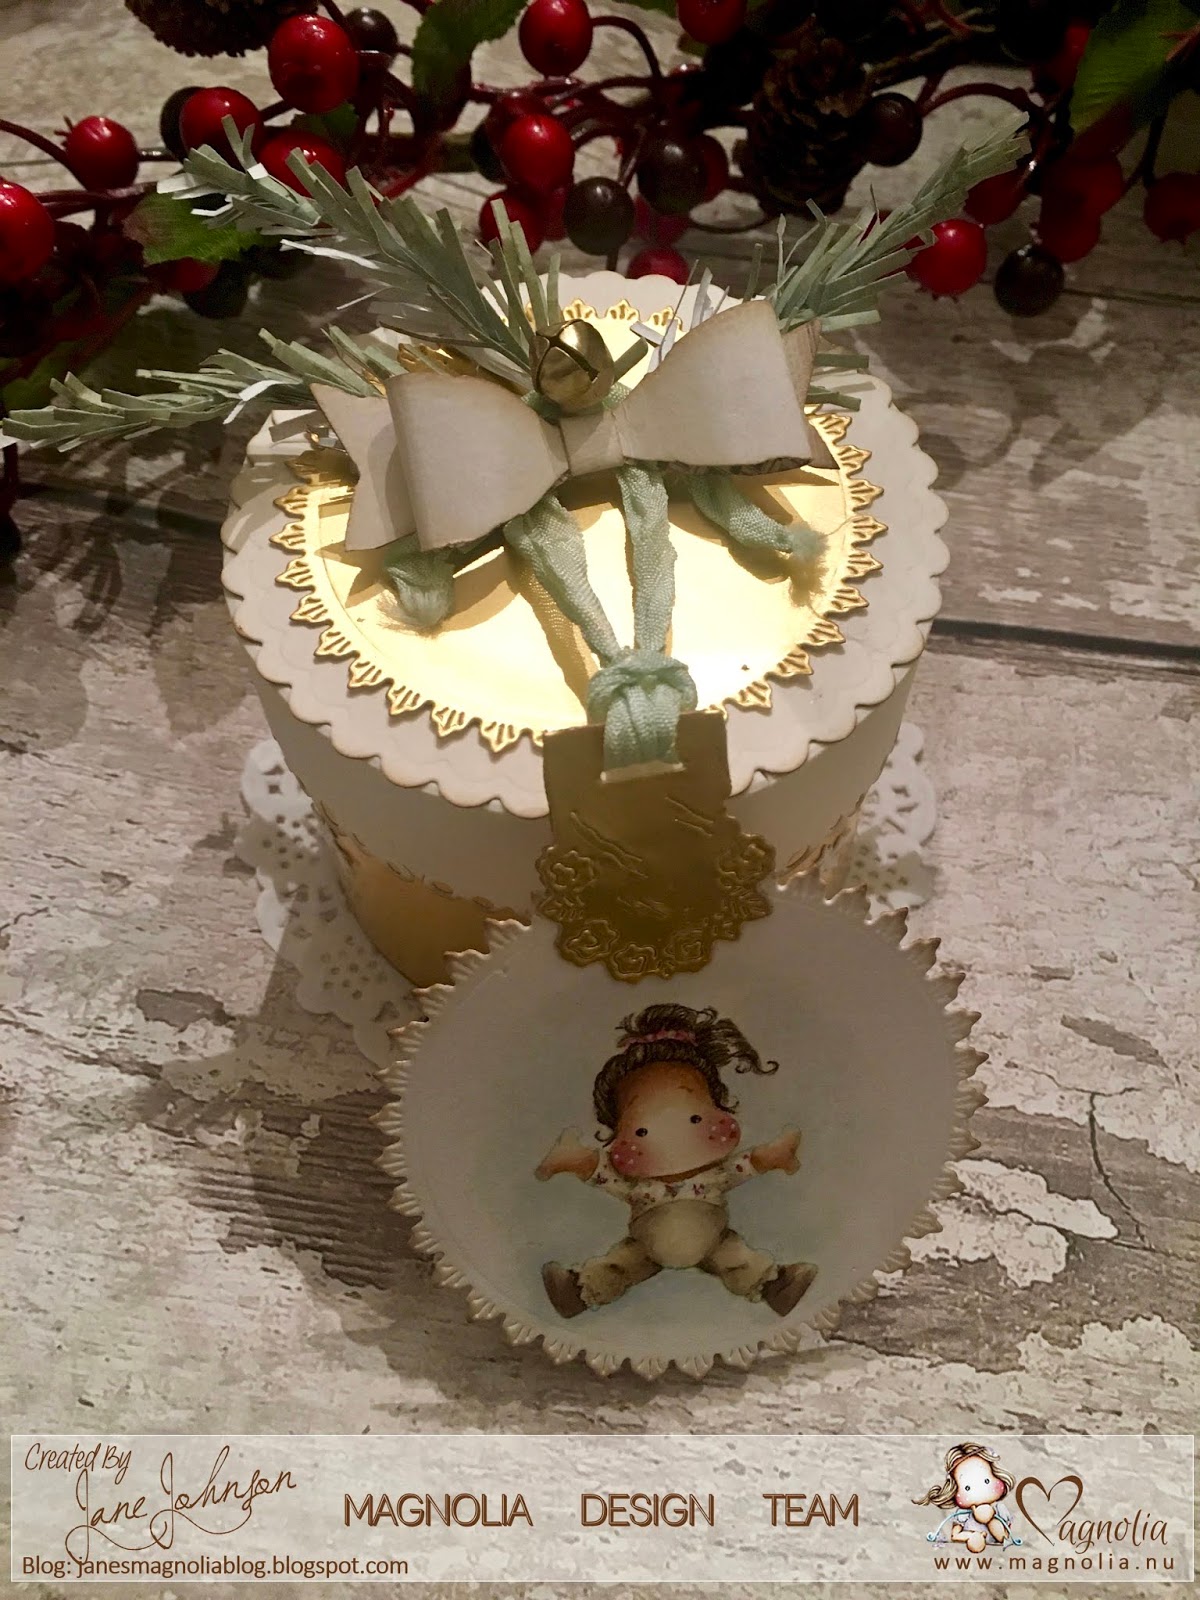
Good morning!  I hope you've had fun opening your Advent calendars this morning!  If you managed to get your hands on the Magnolia Advent calendar you might recognise the little cuties on my gift box today for our new TOMIC challenge.  I have created a round gift box with gold and cream cardstock for a sophisticated Christmas look.


For the tag I have used a Doohickey from Volume 23 and the mini wrapping tag and Tilda from the Advent calendar's early bird envelope.  It is difficult to see in the photo but I have added some Wink of Stella to Tilda's trousers to make them a shiny gold.


This little wrap tag will come in handy for all sorts of tags and bags!


I used the same circle as the tag on the lid of my box and topped it with a paper bow and pine fronds created with the incredible Doohickey die from Volume 1, and topped them with a jingle bell.


I added tiny snowflakes cut with the Doohickey dies from Volume 23 and the edge of the lid was cut with a lace edge Doohickey from the same volume.


I hope you like it and I've inspired you to join us this month at TOMIC.  Pop over to the blog to see the rest of the team's stunning gift boxes!

Tuesday, 26 November 2019

Tilda With Little Snowy


Good morning!  Today for Craft Heaven I'd like to share a Christmas card using the stunning Tilda With Little Snowy from the A Lovely Christmas Collection by Magnolia.  I've also used gorgeous Maja Design Christmas paper from the Christmas Season paper collection.


As always, I have painted Tilda with Distress Inks using the no lines technique.  I have also used a white gel pen to add the snowflakes and the dots on her eyes and cheeks.  I've added Stardust Stickles to Snowy and the snowflakes.  I've also added some to the snow around Tilda's feeet.


The seam binding and mittens charm are from Craft Heaven...


...and so are the white cherry blossoms.  The snowflakes and trees were cut with Doohickey dies from Volumes 5 and 23.


I hope you like it and thanks for looking!


Monday, 11 November 2019

Craft Heaven DT - Nutcracker Christmas Card


Today I have a special card to show you that I have created to give to my daughter this Christmas using gorgeous Christmas papers from Maja Design's Christmas Season collection: Deck the Halls and Vintage Red Light.  I have adorned the 'belly band' with some pretty vintage seam binding and a snowflake charm from Craft Heaven.


Remove the 'belly band' and we glimpse the hint of a snow scene created with Magnolia Doohickey dies.  What could be waiting for us inside?


The Nutcracker ballet!


Here is the full scene of the Sugar Plum fairy dancing while the Nutcracker looks on.  I have added sweet gingerbread houses, glittery trees and snowflakes to create the magical land of sweets!


As always I have painted the images with Distress Inks using the no lines technique.  My Sugar Plum fairy is Spellbound Tilda from the Spellbound Kit.  I removed her ice-skate by removing the ink from that part of the stamp before stamping so that she is a ballerina.  For the Nutcracker I have used Tilda from the Christmas Party Collection.  I have added tiny star shaped gems from my stash around the pair.


I have used the Theatre Curtain from the Once Upon a Time Collection to frame the 'stage'.  To get the opposite curtain I have reverse stamped it.  The curtains are also painted with Distress Inks.


I have used the Tim Holtz Pine Tree die to cut the large, glittery tree and Doohickeys for the rest of the scene.  The snowflakes are from Doohickey Volume 23.  I have added Stardust Stickles to the snow on the gingerbread houses and the white trees.


 The large snowflakes on the front are from Vintage Box Volume 4.


I hope you like it and thanks for looking!  To discover more projects using the gorgeous Maja Design Christmas papers pop over to the Craft Heaven Blog.

Friday, 1 November 2019

TOMIC #8 - Blue & Brown


Good morning!  It is time for another challenge over on the TOMIC blog, and this month our theme is 'Blue and brown'.    This was the perfect colour combination to provide me with an idea for my dad's birthday card.  I always find men's cards tricky!  The papers are all from Maja Design.


I painted the Dot Muffin stamp from the A Little Yummy For Your Tummy collection with Distress Inks using the no lines technique.  I then added 'Dad' with some alphabet stamps from my stash.  I created the background for the muffin with two different sentiment stamps: Happy Birthday, from the You Are So Special collection, and It's Your Birthday, from the Yay It's Your Birthday collection.  The muffin has been curved to add a realistic shape and added to the card with foam pads.


You can see how it curves in this photo!  I hope you like it and I've inspired you to join us this month at TOMIC.  Pop over to the blog to see the rest of the team's gorgeous creations.  Thanks for looking!